How to Export Epics, Tasks and Dependencies from AxioPlan to Jira
Step-by-step guide to connecting Jira Cloud with a personal API token and exporting a project plan's epics, tasks, dates, statuses and dependency links into Jira.
A plan is only useful once the team can work from it. For most software teams that means Jira, and until now it meant retyping every epic, task, date and dependency by hand after the estimate was approved.
AxioPlan can now push a project straight into Jira Cloud. Your epics arrive as Jira epics, tasks arrive underneath them with start and due dates, statuses carry over, and the dependency lines from your Gantt chart become real blocking links in Jira.
This guide walks through the whole process: creating an Atlassian API token, connecting your Jira site once, and exporting a project. Setup takes about ten minutes the first time; every export after that takes under a minute.
Before you start
Check these before you begin. Most failed connections come down to one of them.
- A Jira Cloud site, the kind with an address like your-team.atlassian.net. Jira Data Center and Jira Server are not supported.
- An Atlassian account that can work in the Jira project you want to export into. It needs the standard Browse projects, Create issues, Link issues and Transition issues permissions. Regular team members have these by default; you do not need to be a Jira admin.
- A Jira project to receive the issues. If you are trying the export for the first time, create an empty test project so you can look at the result without mixing it into live work.
- Owner access to the AxioPlan project. People a project has been shared with in read-only mode don't see the Export to Jira option.
- On the free plan, the project must be unlocked. Projects locked by the free-plan limit can't be exported until you upgrade.
What gets exported to Jira
AxioPlan exports the structure and schedule of your plan: epics, tasks, descriptions, start and due dates, statuses and blocking dependencies. Estimation data such as sizes, confidence levels, costs and team assignments stays in AxioPlan.
Here is how each part of your plan maps onto Jira:
- Epics become Jira issues of the type you choose (normally Epic). Each epic's start and due dates span its tasks, from the earliest task start to the latest task finish. An epic with no tasks is created without dates.
- Tasks become Jira issues of the type you choose (Task or Story), placed under their epic as child issues.
- Descriptions are copied onto both epics and tasks.
- A task's start date fills Jira's Start date field, and its due date is set to the last working day of the task. Weekends are skipped exactly as they are on your Gantt chart.
- Statuses carry over: in-progress tasks move to In Progress and completed tasks move to Done. Not-started tasks stay in your workflow's first status.
- Dependencies become Jira Blocks links. If task B depends on task A, Jira shows A as blocking B, and B as blocked by A.
- Not exported: assignees, estimates and sizes, progress percentages, confidence, roles and rates, and epic colours.
Step 1: Create an Atlassian API token
AxioPlan connects to Jira as you, using a personal API token instead of your password. You create the token in your Atlassian account settings, and you can revoke it there at any time.
Sign in to Atlassian and open id.atlassian.com/manage-profile/security/api-tokens. Click Create API token, give it a name you will recognise later, such as AxioPlan export, choose an expiry date, and click Create. Copy the token straight away: Atlassian shows it only once.
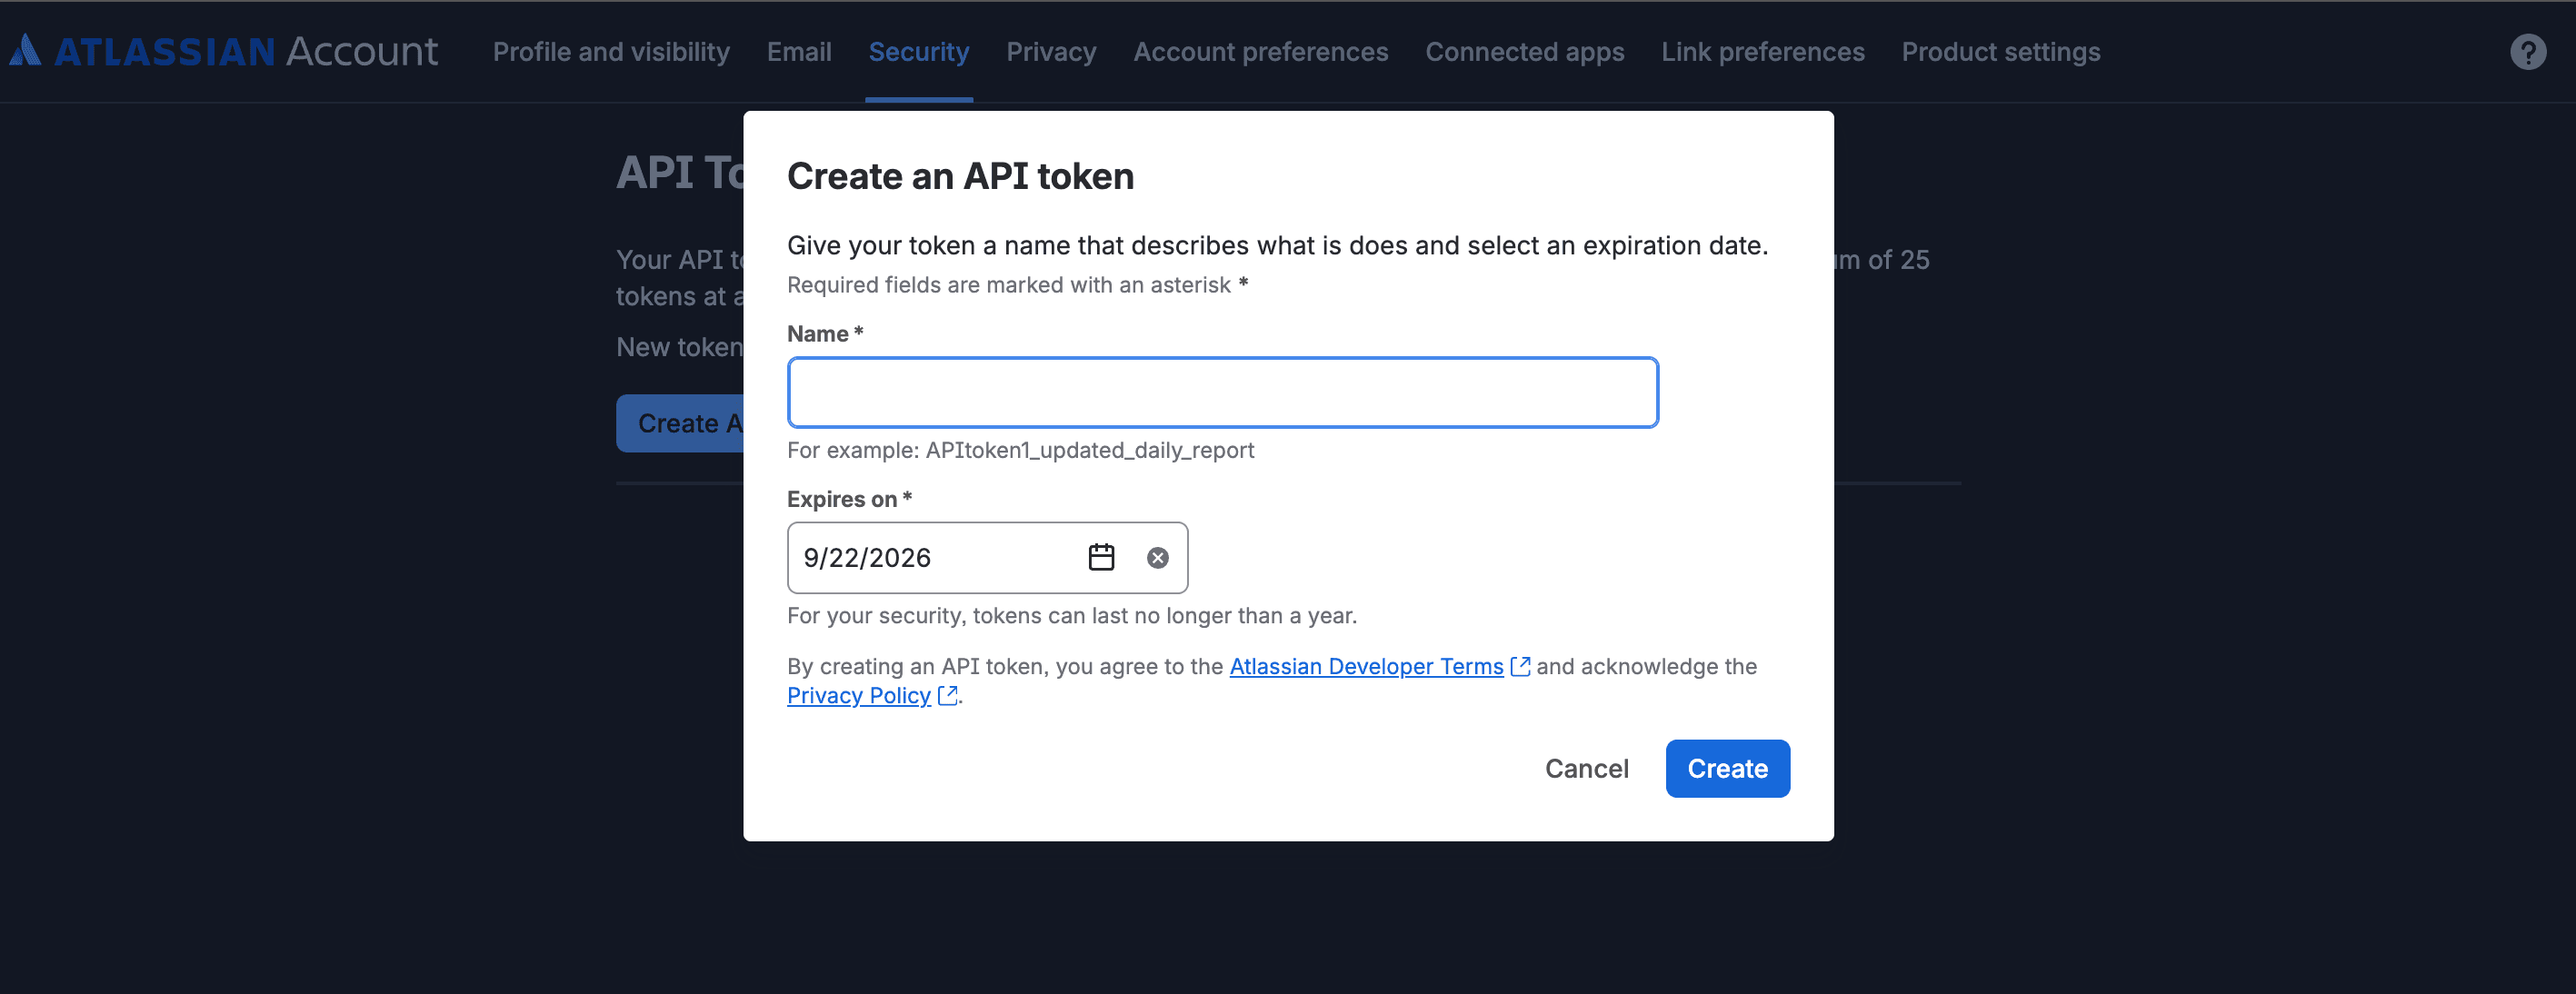
- The token must start with ATATT. Atlassian has other credentials that look similar but won't work here: access tokens begin with ATCT and Bitbucket app passwords begin with ATBB. AxioPlan tells you if you paste one of those by mistake.
- Both classic API tokens and API tokens with scopes work. If you create a token with scopes, include at least read:jira-work and write:jira-work.
- Treat the token like a password. Don't paste it into chat tools, tickets or documents; if it leaks, revoke it and create a new one.
- Tokens expire. When yours does, AxioPlan flags the connection and you reconnect with a fresh token, as described under Troubleshooting below.
Step 2: Open Connections in AxioPlan
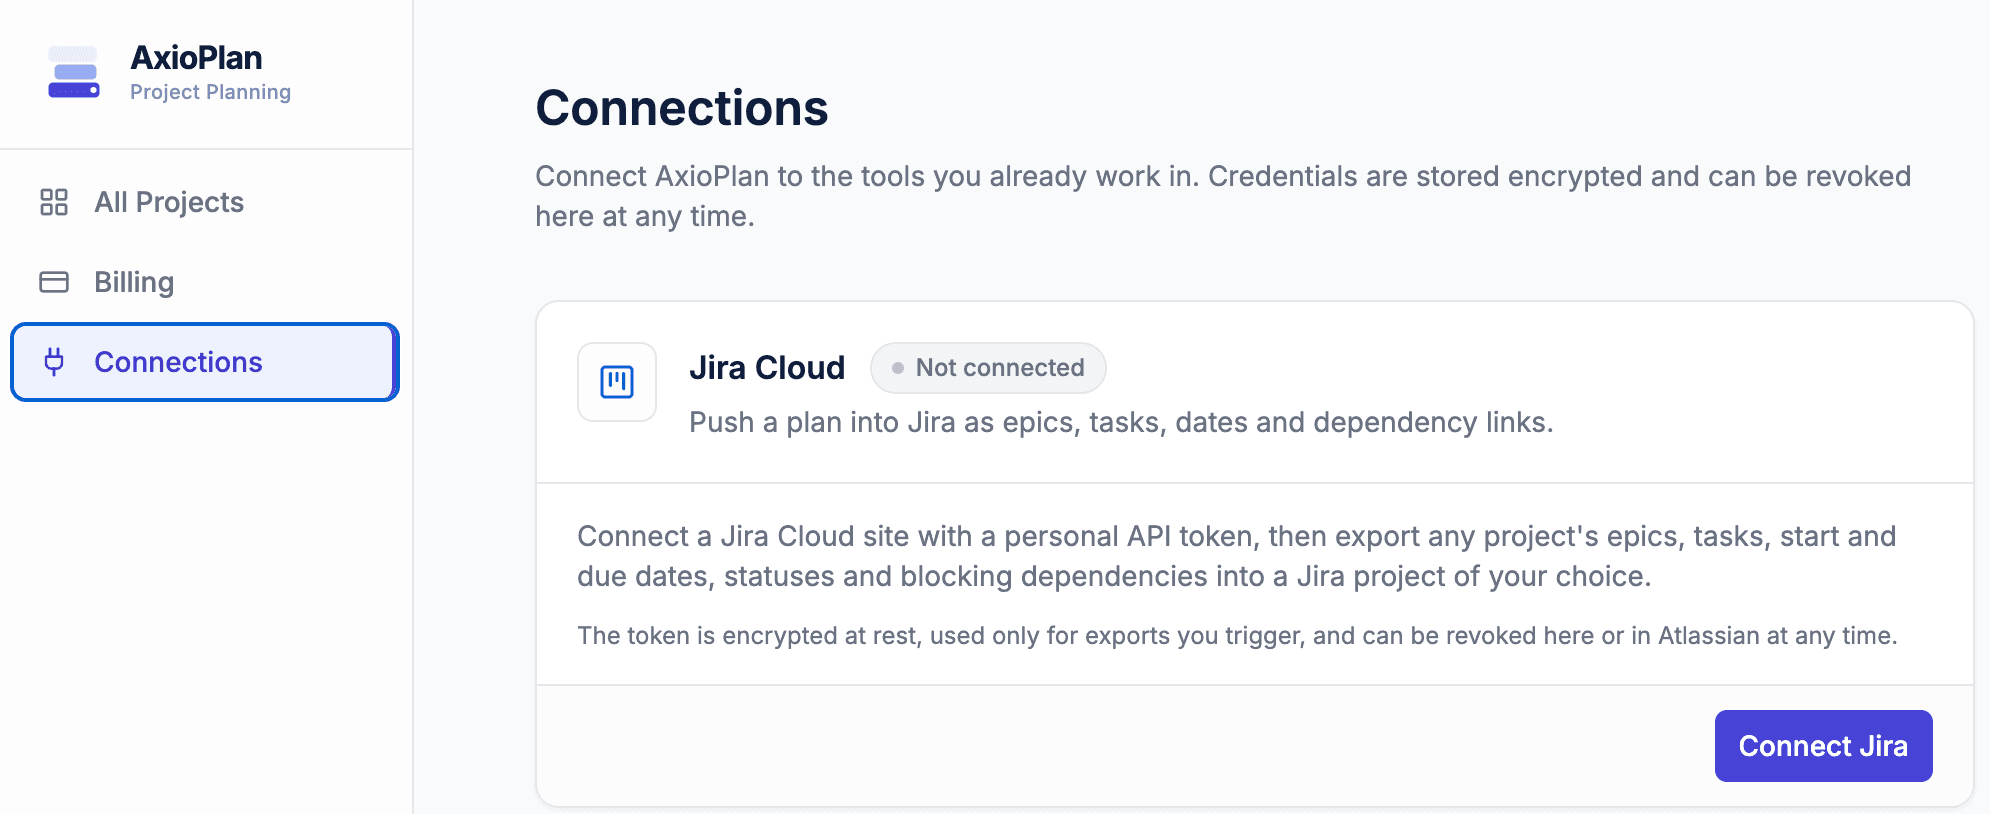
In AxioPlan, click Connections in the left sidebar; it's the plug icon. The page lists the integrations available for your account. Find the Jira Cloud card, which reads Not connected, and click Connect Jira.
You only connect Jira once per AxioPlan account. The same connection is used for every project you export.
Step 3: Connect your Jira Cloud site
The Connect Jira Cloud dialog asks for three things. Fill them in and click Connect. While the button reads Checking…, AxioPlan signs in to Jira with your details to confirm they work, so a mistake shows up now rather than halfway through your first export.
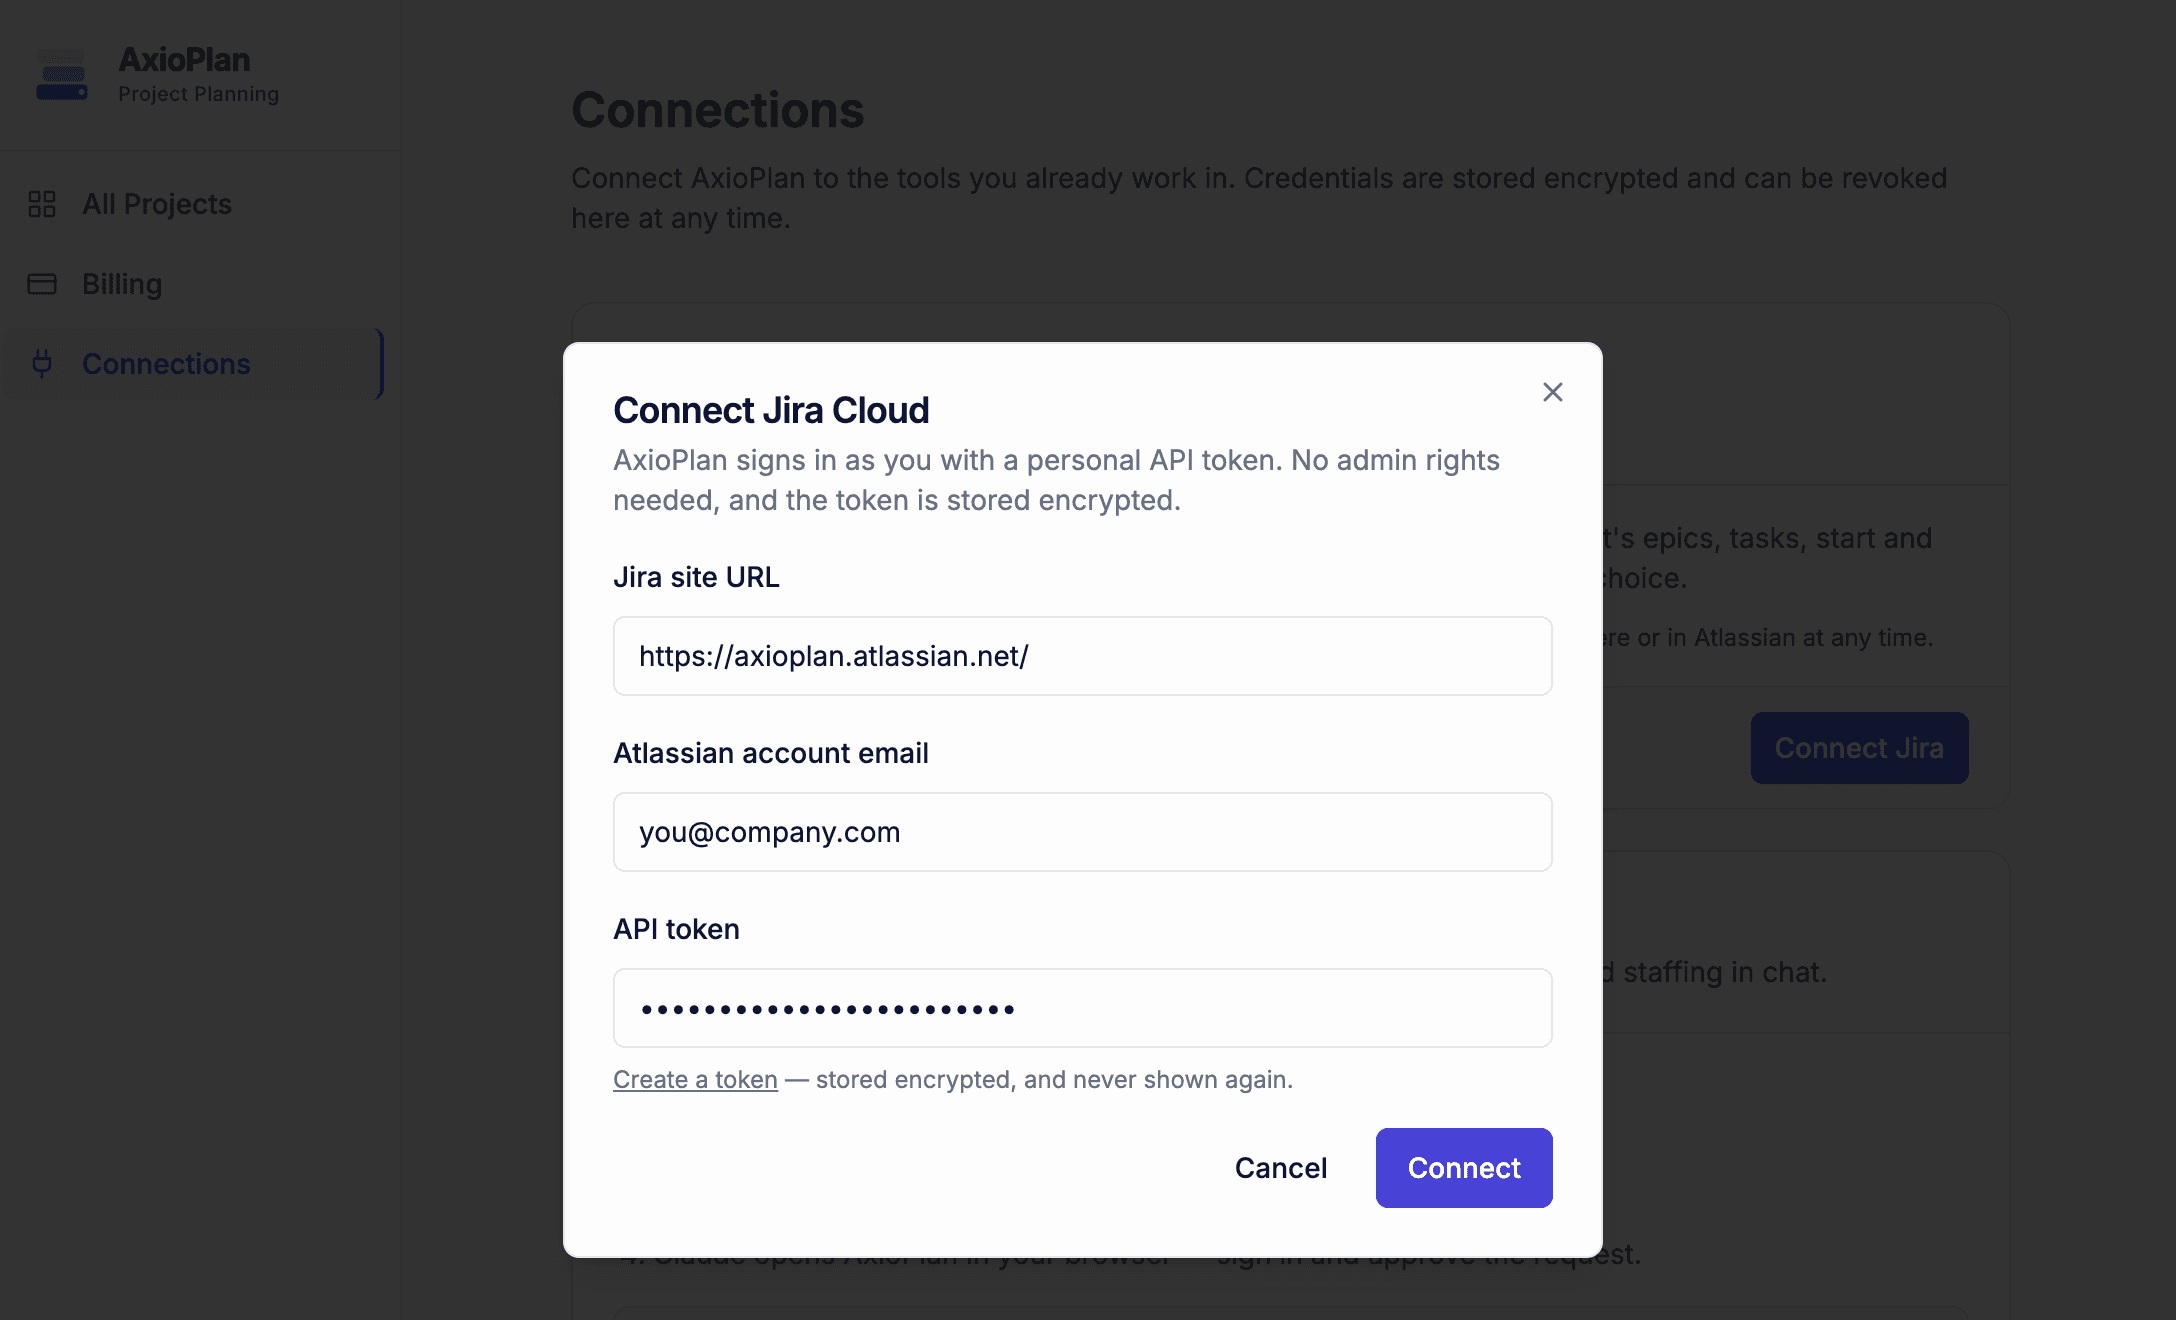
- Jira site URL: your site's address, such as https://your-team.atlassian.net. Copy it from your browser's address bar while Jira is open, but keep only the part up to .atlassian.net. Addresses with a path after them, like /jira/software/projects, are rejected.
- Atlassian account email: the email address of the Atlassian account that created the token. This is the most common source of errors. If you sign in to Jira with a work address, use that address here, even if you also have a personal Atlassian account.
- API token: paste the token you copied in Step 1.
- If Jira rejects the details, the dialog stays open and explains the problem, so you can fix the field and try again.
Step 4: Confirm the connection
Once Jira accepts the token, the dialog closes and the Jira Cloud card changes to Connected. It shows which site and account AxioPlan uses, when the token was added, when you last exported, and when the connection was last checked.
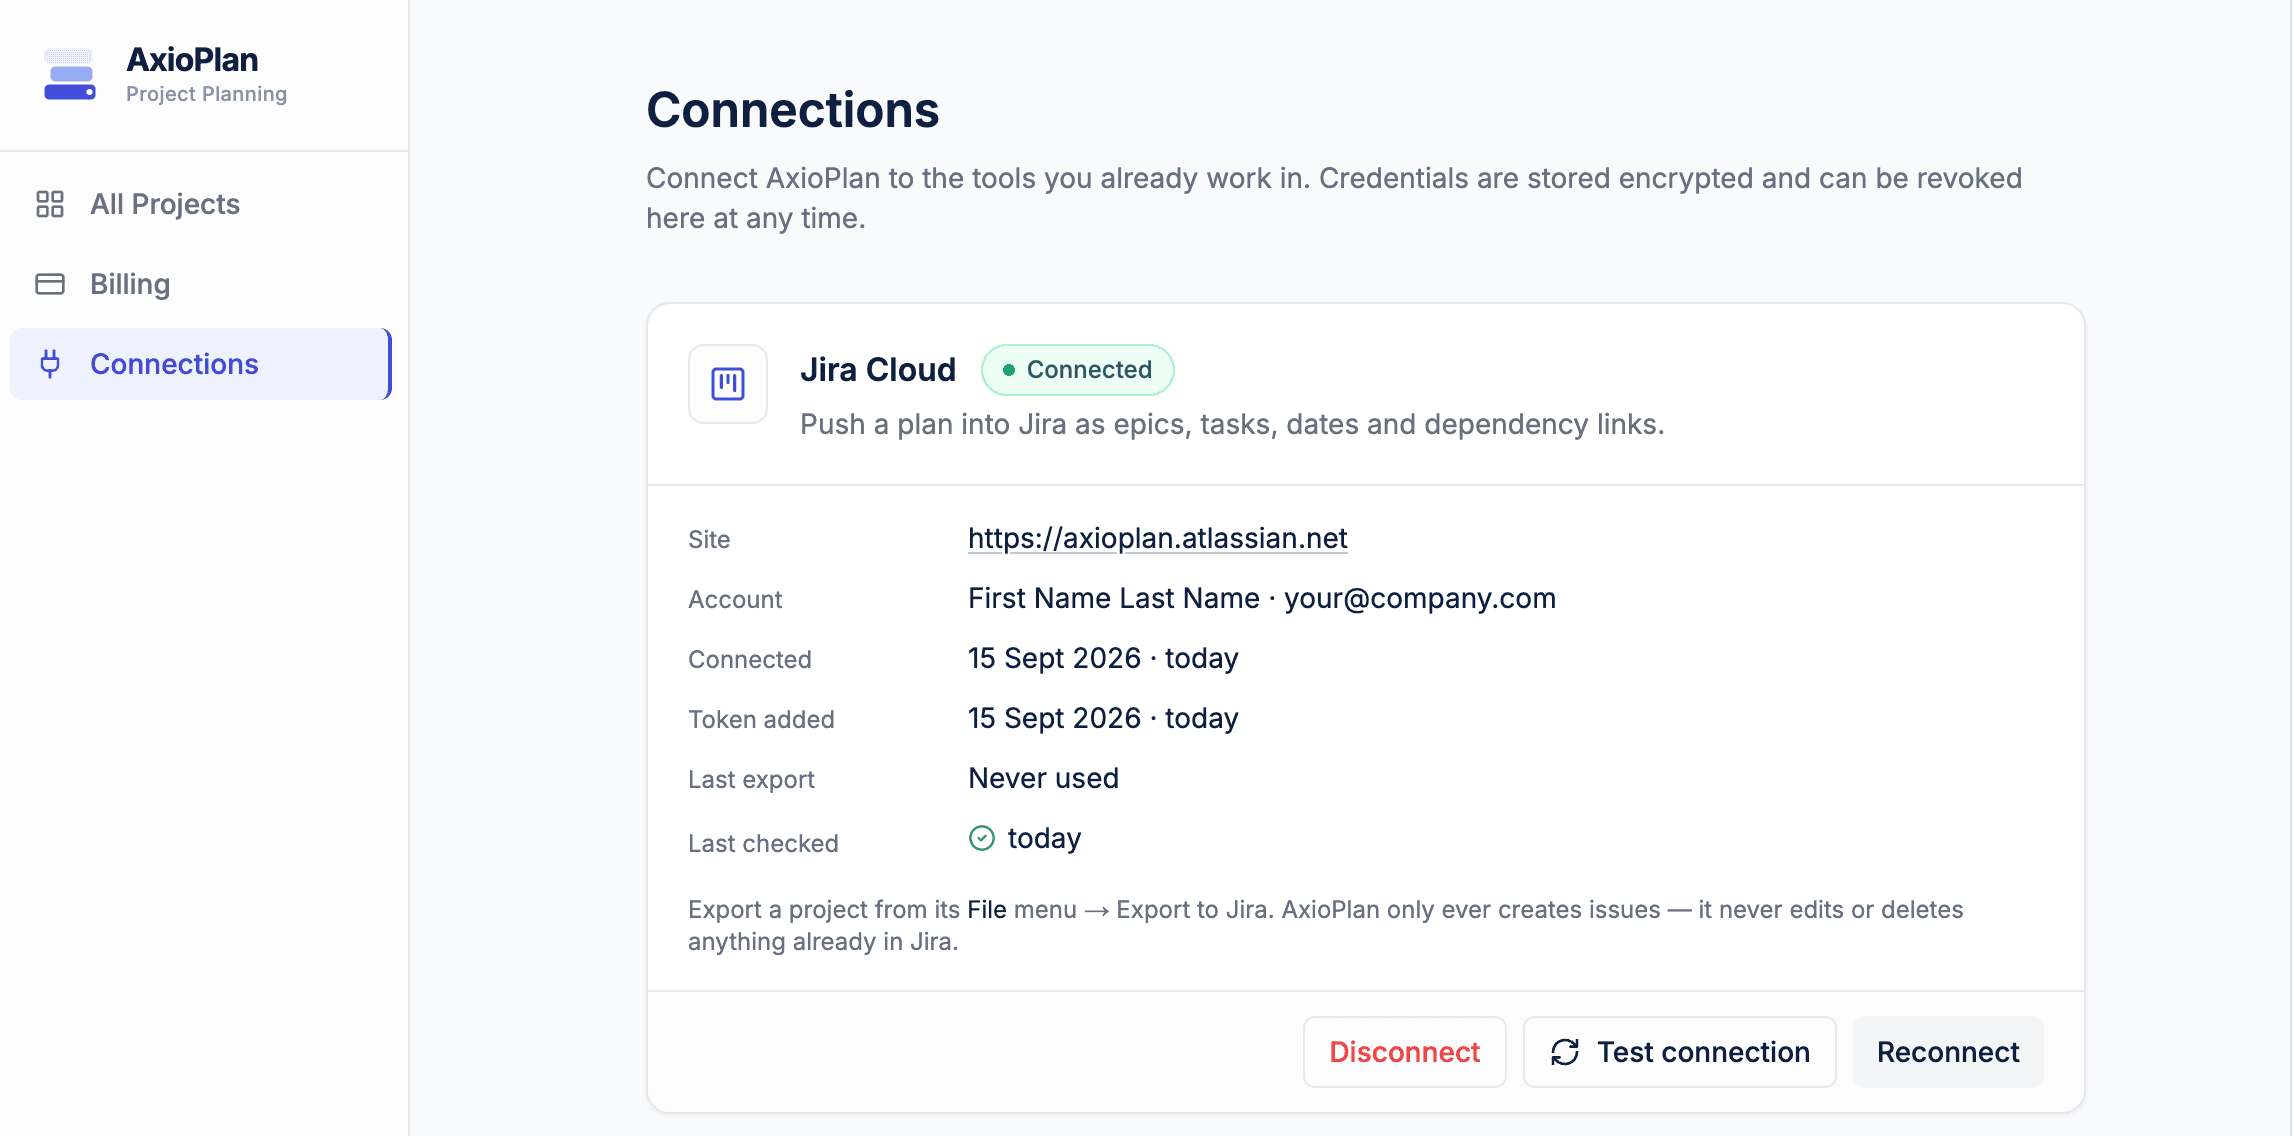
- Test connection signs in to Jira again with the stored token. Use it when you want to be sure the token still works before a big export.
- Reconnect opens the same dialog with your site and email already filled in, so you only paste a new token.
- Disconnect deletes the stored token from AxioPlan. Issues already created in Jira are not affected.
- Your token is encrypted before it's stored and is never displayed again, not even to you.
Step 5: Open your project and choose Export to Jira
Open the project you want to export. In the top bar, click the file menu, the icon button with a small arrow next to it, just left of Save. Choose Export to Jira… at the bottom of the menu.
Before exporting, it's worth a quick look at the Gantt chart. Make sure tasks sit under the right epics and that the dependency lines are the ones you want in Jira, because the export copies exactly what's on the chart.
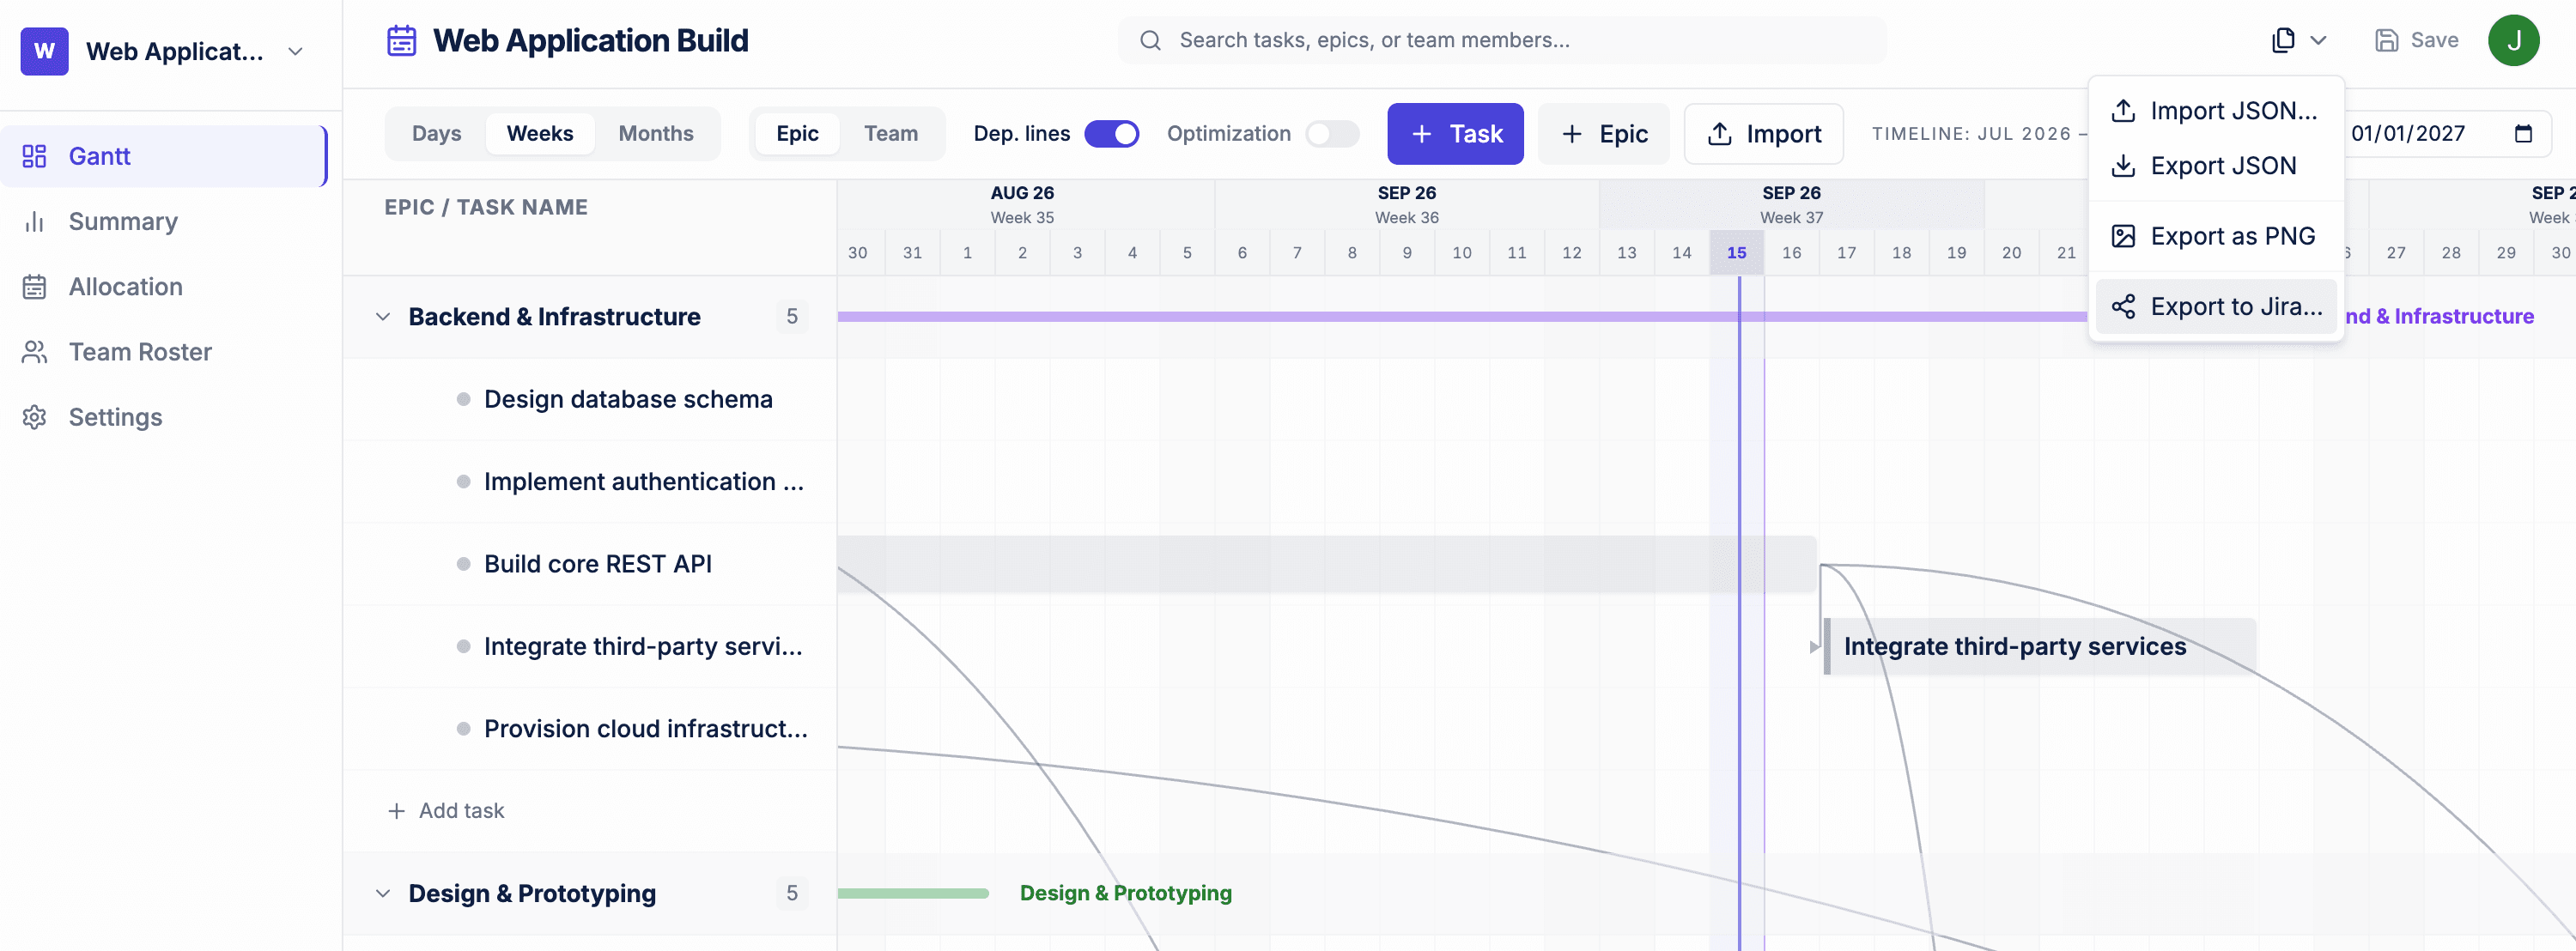
- If you haven't connected Jira yet, the export dialog says so and offers a Connect Jira button that takes you to the Connections page.
- If Export to Jira… isn't in the menu, you're viewing a project that was shared with you in read-only mode. Ask the project owner to export it.
Step 6: Choose the Jira project and issue types
The Export to Jira dialog confirms which site and account you're exporting as, then asks where the issues should go.
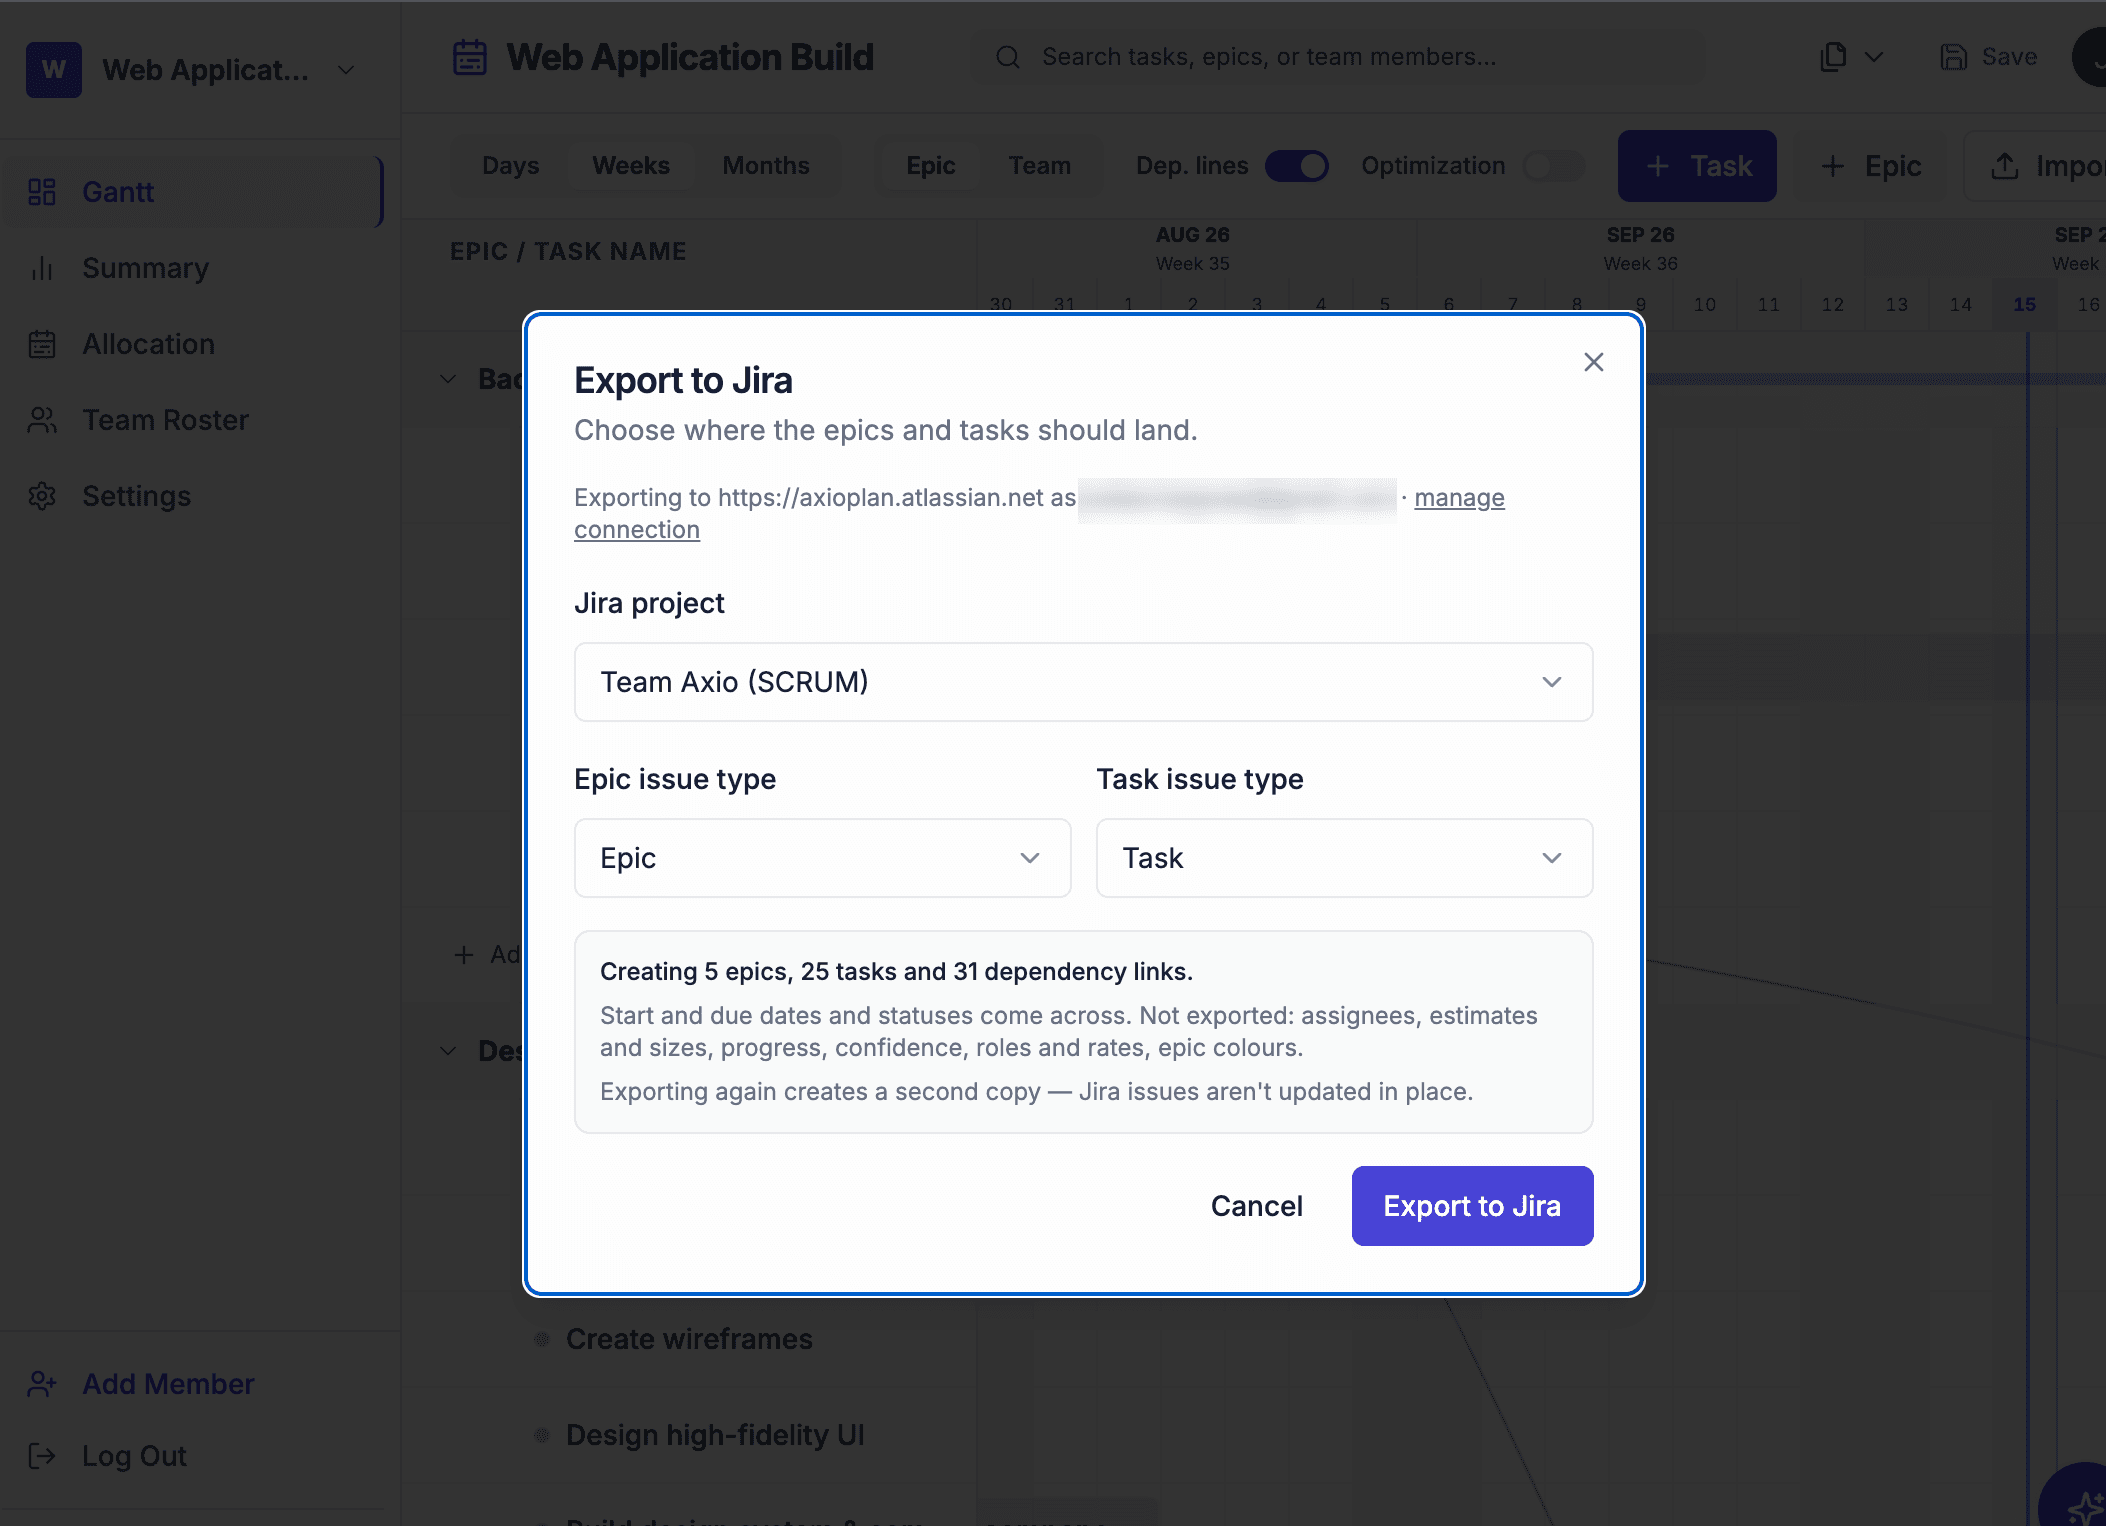
- Jira project: the list shows the projects your Atlassian account can see. Pick the one that should receive the issues.
- Epic issue type: AxioPlan picks Epic when the project has it. Keep it unless your team uses a different type for large pieces of work.
- Task issue type: AxioPlan picks Task, or Story if the project has no Task type. Choose whichever your team normally works with. Sub-task types aren't offered because Jira can't create them on their own.
- The summary shows exactly how many epics, tasks and dependency links will be created, and lists what won't be exported. Read it before you click Export.
- Each export creates new issues. Running it twice on the same project gives you two copies, because AxioPlan never edits or deletes issues that already exist in Jira.
Step 7: Run the export and review the result
Click Export to Jira. AxioPlan creates the epics first, then the tasks under them, then the dependency links, and finally moves each task to its status. A plan with a few dozen tasks usually finishes in seconds; very large plans can take a minute or two. Keep the dialog open until it finishes.
When it's done, the dialog shows how many epics, tasks, links and status changes reached Jira. Click Open in Jira to go straight to the project.
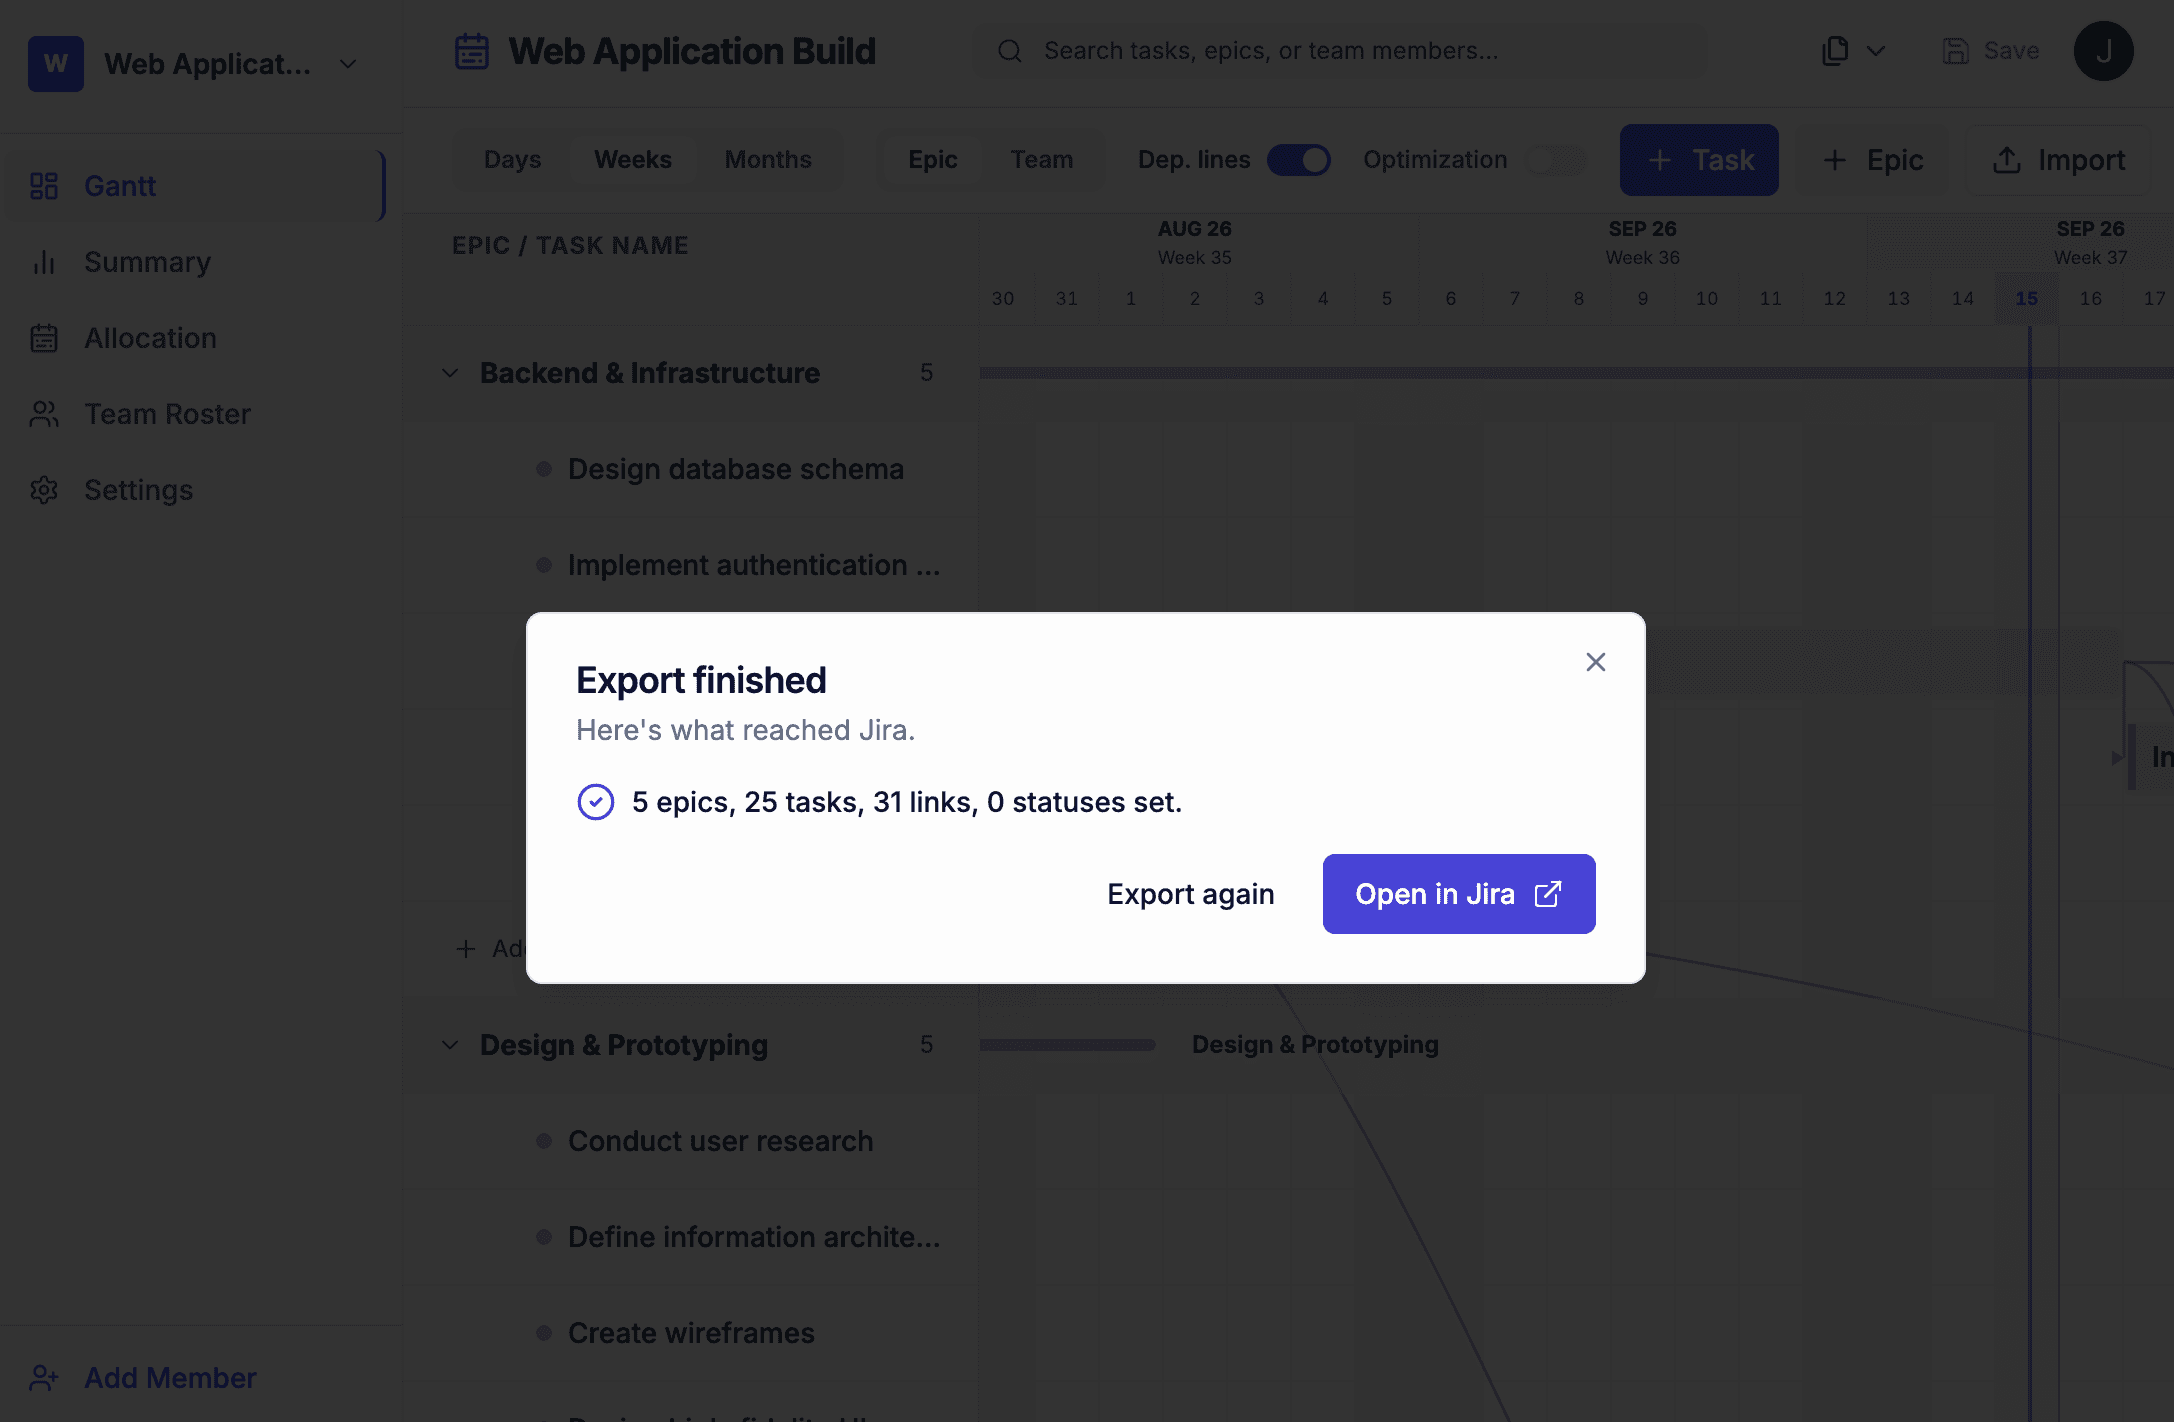
- If some items couldn't be created, they're listed by name with Jira's own explanation. Everything else still reaches Jira: one rejected task doesn't cancel the rest of the export.
- If a task couldn't be created, any dependency links that involve it are skipped too, since there's nothing in Jira to link to.
- If the dialog notes that start dates weren't set, your Jira project doesn't show a Start date field when creating issues. Due dates are still set. See Troubleshooting for the fix.
Step 8: Check the result in Jira
Open the Jira project and look over what arrived. The timeline or list view is the quickest way to check the structure, because it shows each epic with its child tasks and their dates side by side.
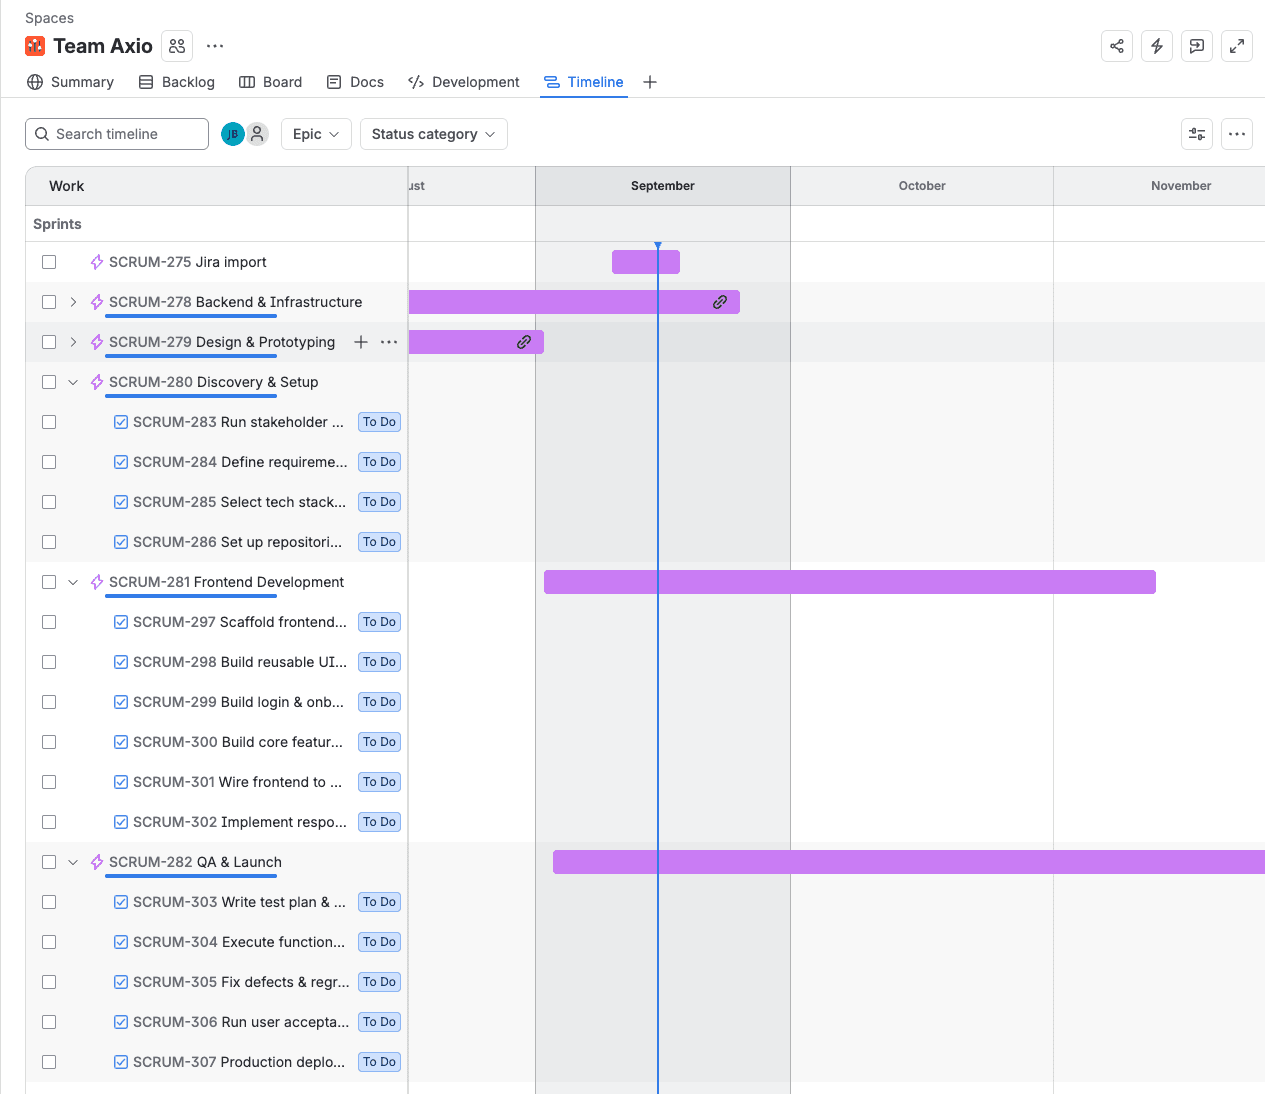
- Each epic lists its tasks as child issues.
- Open a task that had a dependency. Under Linked work items, Jira shows the task it is blocked by.
- Start and due dates match the bars on your AxioPlan Gantt chart.
- Tasks that were in progress or completed in AxioPlan have moved to the matching Jira status.
Troubleshooting
Most problems come from the token, the email address, or how the destination Jira project is configured. These are the messages you're most likely to see and what to do about each.
Jira rejected the credentials
Check that the email is the one belonging to the Atlassian account that created the token. Next, check the token itself: it must start with ATATT. If AxioPlan says you pasted an access token or an app password, create a regular API token as in Step 1. If the token has scopes, make sure it includes read:jira-work and write:jira-work. If everything looks right, the token may have been revoked or expired, so create a new one.
Jira redirected the request to a login page
The site URL doesn't point at a Jira Cloud site. Use only the address up to .atlassian.net, for example https://your-team.atlassian.net, with nothing after it. Double-check the spelling of the site name.
The Jira card says Action needed
Jira stopped accepting the stored token, usually because it expired or was revoked in Atlassian. The card shows Jira's exact message. Create a new token, click Reconnect and paste it in. Exports fail until you do.
Some items didn't make it
Read the message next to each item; it comes directly from Jira. The most common cause is a Jira project that requires extra fields, such as a component or a custom field, before an issue can be created. Ask your Jira admin to make those fields optional, or export into a project that doesn't require them. Permission errors mean your account can't create issues or add links in that project.
Start dates didn't come across
AxioPlan only fills the Start date field if the Jira project shows it when creating an issue. Otherwise it leaves the field out rather than letting Jira reject the whole issue. A Jira admin can add Start date to the project's create screen; after that, new exports include start dates. Due dates are exported either way.
Tasks stayed in the first status
AxioPlan moves tasks to statuses named In Progress and Done. If your Jira workflow uses different names, such as Doing or Closed, it can't find a match and leaves those tasks where Jira created them. The rest of the export is unaffected; move the tasks by hand or bulk-edit them in Jira.
I exported twice and have duplicates
That's expected: every export creates new issues and AxioPlan never changes existing ones. Delete the extra copy in Jira with a bulk change. Use a search filtered on the project and the issue creation time to select only the duplicates.
Disconnecting Jira
To stop AxioPlan exporting to Jira, open Connections and click Disconnect on the Jira Cloud card. AxioPlan deletes the stored token straight away, and issues already in Jira stay as they are.
For complete peace of mind, also revoke the token in Atlassian under Security → API tokens. That makes it useless everywhere, not just in AxioPlan.
Do I need Jira admin rights?
No. AxioPlan uses Jira's standard API with your own API token, so it can do exactly what your Atlassian account can already do in the target project: browse it, create issues, link them and change their status. Regular project members have all of these by default.
You'd only need an admin to change how a Jira project is configured, for example to add the Start date field to its create screen or make a required custom field optional.
From plan to backlog in one step
Planning and delivery tend to drift apart the moment a plan is copied into a delivery tool by hand. We looked at the cost of that gap in Project Managers Became Human APIs Between Broken Planning Systems.
Exporting straight from AxioPlan keeps the handover faithful: the dependencies you worked out on the Gantt chart are the dependencies your team sees in Jira, and the dates in the estimate are the dates on the tickets.
Explore the product on the features page section, compare flat pricing, or log in to plan your next project with the whole team in AxioPlan.